Gather ’round, Internet wanderers; today, I will show you how to create a QR code that lets guests quickly join your WiFi network.
[Content warning – epically long post, will look at referencing some shorter videos on YouTube, TikTok, Instagram or FaceBook when I have time to record and edit]
Gone are the days of hunching over your phone, trying to type in that long, convoluted password that looks like a cat walked across your keyboard while swearing furiously. With a simple scan, your guests can quickly join your wireless network with style and a bit of technological flair!
What is a QR code?
But before we dive into the process, let’s take a quick detour and explain what a QR code is, shall we? QR codes, or Quick Response codes, are those funny little square patterns that look like a pixelated Rorschach test. They can be scanned with a smartphone, leading you to a website, text, or even join a WiFi network!
Try this one below – which should let you stalk me on all my ‘socials‘; remember to subscribe, like and hit that ‘bell‘ button… hahaha:
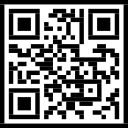
More technically, QR codes are a specific type of ‘barcode‘ – of which there are many – but they all fundamentally consist of visually encoding text and numeric information. The resulting encoded image can be printed onto real-world objects, such as; signs, posters, business cards, cups/mugs/tumblers. Next – at any later point, a digital camera can quickly scan and convert that printed image back into data.
The final key that unlocks the usefulness of QR codes is that over the last several years, all Apple and Android mobile phone or tablet operating systems now scan QR codes directly – without any sketchy third-party apps to install – and will then perform automated actions depending on the data contained within the code.
Some examples of actions include the following;
- Joining a WIFI network
- Launching a web browser and opening a website URL
- Opening a map application to provide directions to your location
- Preparing an email message with a target address, subject and body
- Calling a telephone number
- Sending an SMS/MMS message
- Adding a ‘contact’ to the address book
- Adding an ‘event’ to the calendar
- Connecting the mobile operating system store and opening the page for an app
If you have an Apple (iOS) device, QR codes can help you:
- Start a FaceTime audio or video call
- Open the Apple Music or iTunes store to a specific Album, Song or Artist
- Open the iBooks store to a particular item
- Launch the built-in YouTube app with a specific video
The first thing you will find when you start researching this topic is that there is a myriad of websites wanting to “help” you generate your QR code for “Free” (at least to start).
The cold hard truth is – while they may give you a free QR code, most will often encode your target URL to first pass through some form of re-direct via their services – therefore, every scan – by anyone will be tracked by them.
But wait… there’s more; next, they will ask you to register, and then you find another ‘gotchya‘ – you only get “10 free” QR code scan lookups per month, any more, and you have to pay…
All of that is entirely unnecessary.
You just need to understand the textual encoding for what you want to do – and then generate your QR code using any free and unencumbered tool, website or utility.
WiFi QR Code Formatting Explained
First – let’s understand the format of the text we need to create, which will tell a mobile phone or tablet to join a WiFi network – later, we will encode this text into a visual QR code.
You will need to know several details about the wireless network you want to share;
- WiFi Network Name
- Security Type
- Password
- Visible or Hidden
This article will not cover the specifics of wireless network security – or creating a separate ‘guest‘ wireless network isolated from your primary network – which you can research separately – but are highly recommended. If you are making a sign for your coffee shop, do you want your customers on the same network as your payment transactions – probably not.
Here is the magic, ‘super-secret‘ text that tells a mobile device how to connect to a WiFi network:
WIFI:S:<SSID>;T:<WEP|WPA|blank>;P:<PASSWORD>;H:<true|false|blank>;
Yikes. Right?
Let’s add some colour to help break this down.
Well… This is just several units, each separated by semi-colons; within an individual section, the type is distinguished from the value using a colon. Let’s add some colour to help us break them apart as follows;
WIFI:S:<SSID>;T:<WEP|WPA|blank>;P:<PASSWORD>;H:<true|false|blank>;WIFI:
This is the “action” header; it instructs the mobile operating system that what follows will describe enough information to connect to a wireless network.
S:<SSID>;
Yuck – why couldn’t they say “Network Name“? Technically, this is called the “Service Set Identifier“, and if you need more of a nap than I am giving you, you can find out more here. One thing to note – you may have multiple names, and your WiFi router/access point may have separate SSIDs for the 2.5GHz and the 5GHz radio frequencies. If they do – consider reconfiguring your wireless network frequencies to only have a single name; this will let any devices automatically determine the best network for their needs.
Name. That’s all this means – when crafting your textual QR code, you must replace ‘<SSID>‘ (including the brackets) with your network name.
T:<WEP|WPA|blank>;
Next, we need to describe the “(T)ype” of security used by your WiFi network. 99% of the time, this is going to be WPA. If it is WEP or blank, you have no network security at all… (There is a third type which is relatively complex – you can find more information here).
P:<PASSWORD>;
Finally – your password field one should be self-explanatory, but note the following – if either your SSID or Password contain any of the following special characters – you will need to escape each of them using a ‘backslash‘;
 \
 ,
 ;
 :
For example, if my WiFi network name was: “Super:Tricky, Silly and Terrible“, I would have to modify the text to be: “Super\:Tricky\, Silly and Terrible“.
Let’s continue with a more straightforward example – the WiFi network name is: “Central Perk“, and the password is: “MediumMocha2023!“.
Also note – if you have problems with the generated QR code, your network name may need to be enclosed within double quotes.
If it’s a relatively new network (like created sometime in the last ten years or so…), we are most likely safe to assume that the security type is: “WPA“. In our example, if this network existed back when Friends first aired, it would likely be WEP – or blank. (shudder – either is essentially like having no security at all)
So – once we start combining those details, our text is going to look like this;
WIFI:S:Central Perk;T:WPA;P:MediumMocha2023!;
But – what about the “(H)idden” parameter? Well – if we know that our network is visible, we can leave it as a blank value – but… for things to work correctly, you still need to include a semi-colon; otherwise, people will not be able to join your network.
With that in mind, our final result is;
WIFI:S:Central Perk;T:WPA;P:MediumMocha2023!;;
Now that we have gathered our technical details – and formatted them correctly, it is time to generate the QR code.
Choose a QR code generator and image format (hint… it’s always ‘vector’)
Remember when we were discussing websites you can use to generate QR codes? Well – even if you choose to use one, keep in mind the following – if you want to have a sign printed professionally – or in our case, engraved with a laser cutter – you want the resulting file to be a “vector” image, as that can be scaled larger or smaller as necessary. Scaling a “raster” image may result in a QR code that just isn’t scannable. (Raster images are made of individual pixels, and Vector images are essentially math and logic that describes what gets drawn onto the screen)
Myself – I prefer to use either of the following; “Tinkercad” or “Zint Barcode Studio“.
Tinkercad is a simple but powerful 3d modelling website made by “Autodesk“, free and straightforward to use. In addition to exporting models for 3d printing, you can export an object for laser cutting in SVG (Scalable Vector Graphics) format.
“Zint Barcode Studio (Zint)” is a free and open-source utility designed to control ALL of the details of barcodes it generates – QR codes are just one of the many available options. Zint allows for borders and margins – and even changing the style to a “dotted” display – which can be more visually pleasing to the eye. You can download it directly here.
The barcodes that Zint generates appear to be smaller and more efficient than the ones created by Tinkercad – however, I have yet to perform a side-by-side test to determine if the engraving is faster or not.
Create a QR Code with Tinkercad
- First, navigate to the Tinkercad website – if you still need to, create a new account and log in.
- Next, select the “Designs” section and create a “New 3D Design“:

- Click on the name of this design in the top-left corner and give it something meaningful; while it auto-generates a unique name – that can be silly and meaningless. If you want to find your design later, a proper name will help:
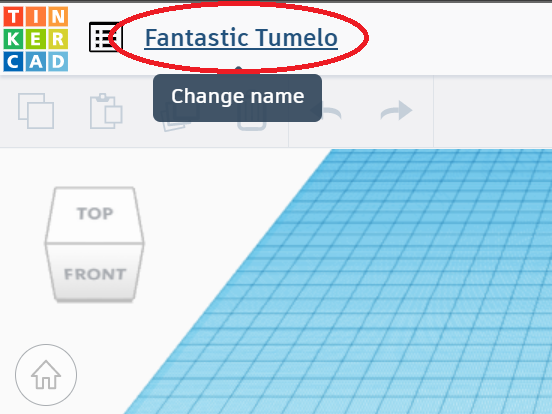
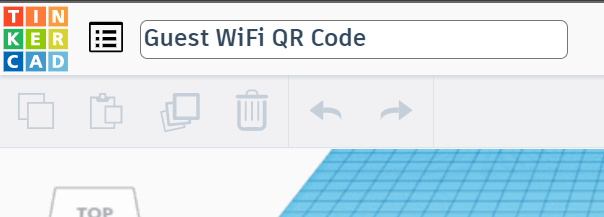
Type the new name and press the “[Enter]” key, or click anywhere else in the design and it will save:
- In the “Shapes” panel on the right side, select the “Search” icon button:
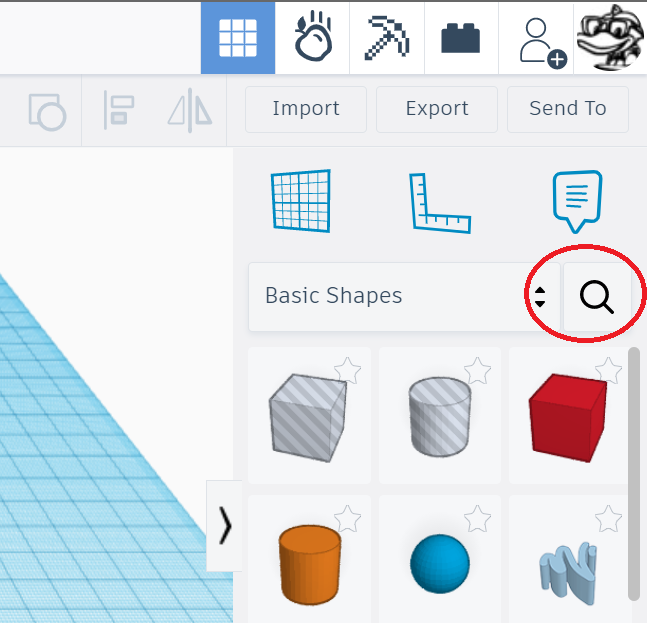
- Next, within the “Search” panel – type: QR code
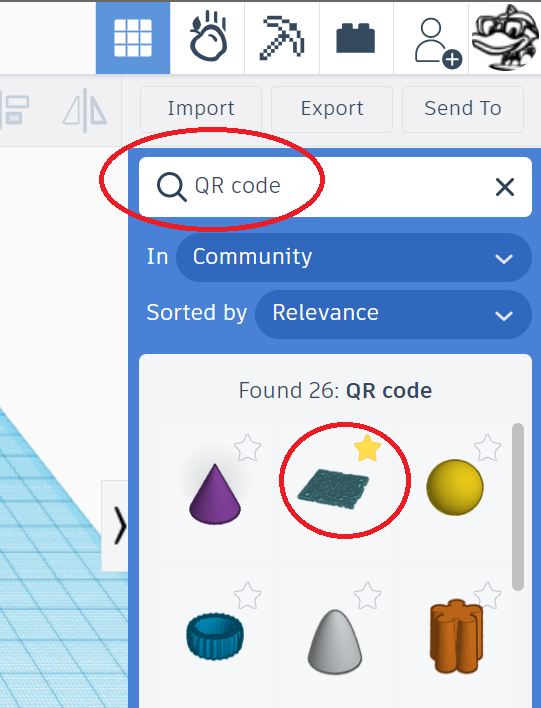
- If you have trouble identifying which search result is the QR code, hover your mouse over each until you find it in the popup description:
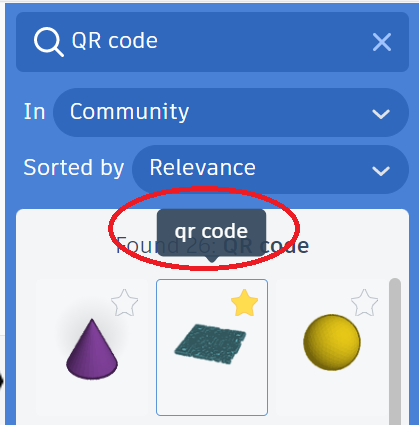
- Drag the QR code onto your design surface.
- The tool panel will pop up for the QR code object:
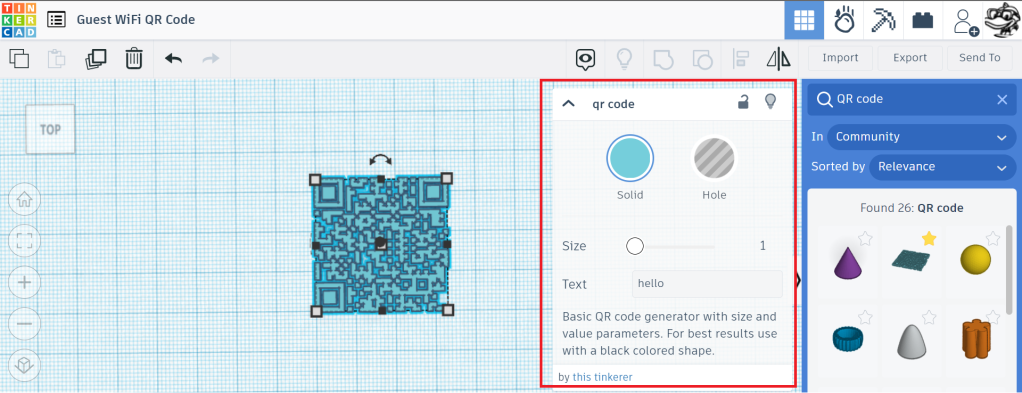
- Change the colour and set ‘black‘ for better visibility:
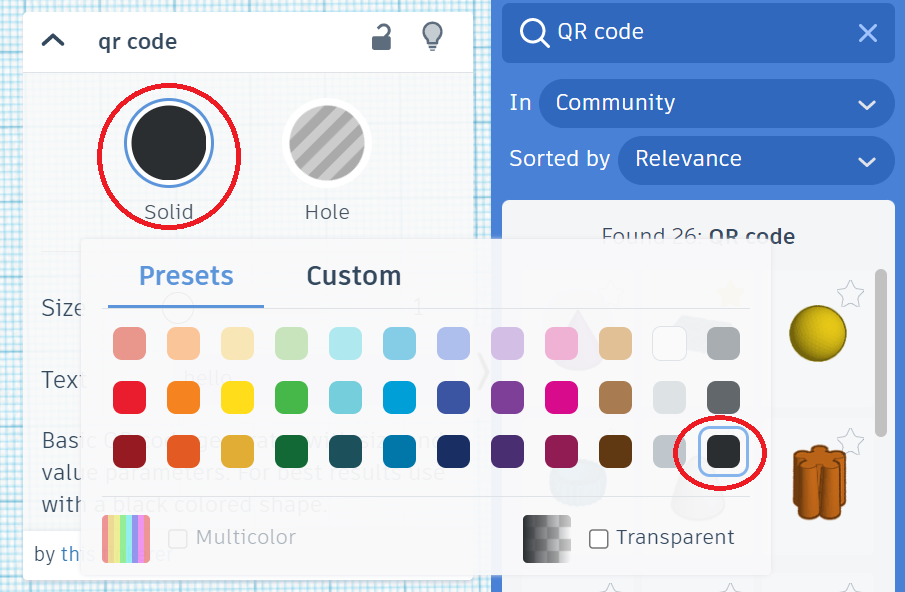
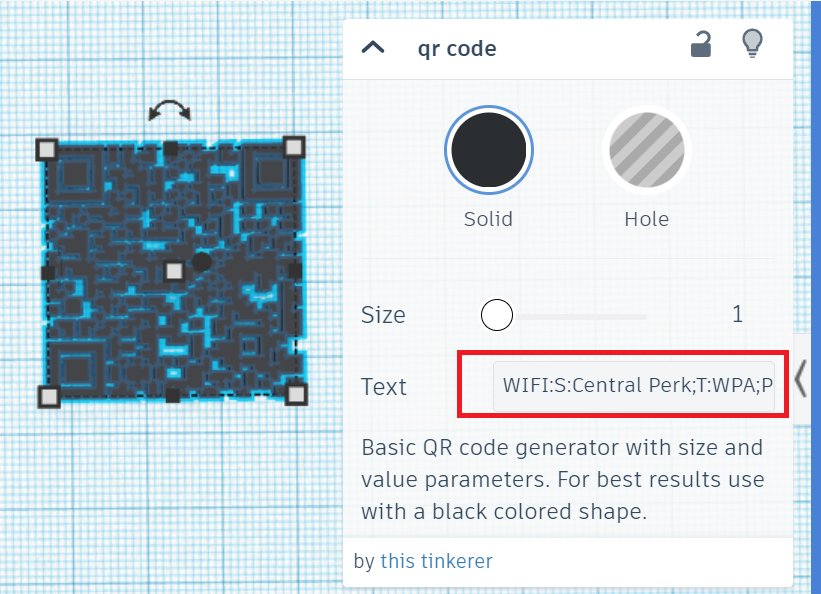
- Next, we need to take the formatted text for our WiFi network that we created previously (i.e. WIFI:S:Central Perk;T:WPA;P:MediumMocha2023!;;)- and copy that into the “Text” value:
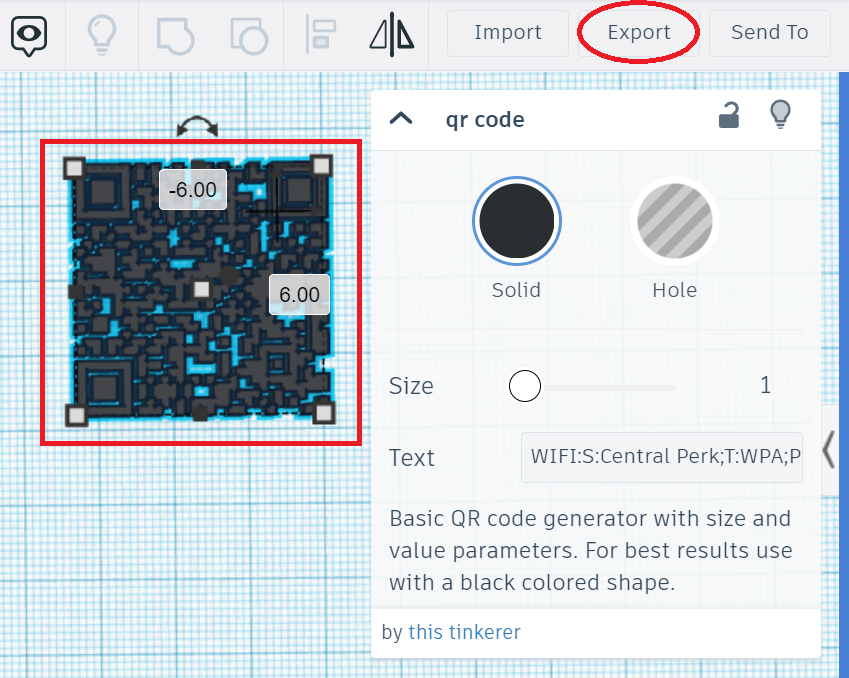
- While the QR code object is still selected on your design surface, click the “Export” button in the toolbar to the top right:
- Choose the “.SVG” option button in the “For Lasercutting” section of the popup window:
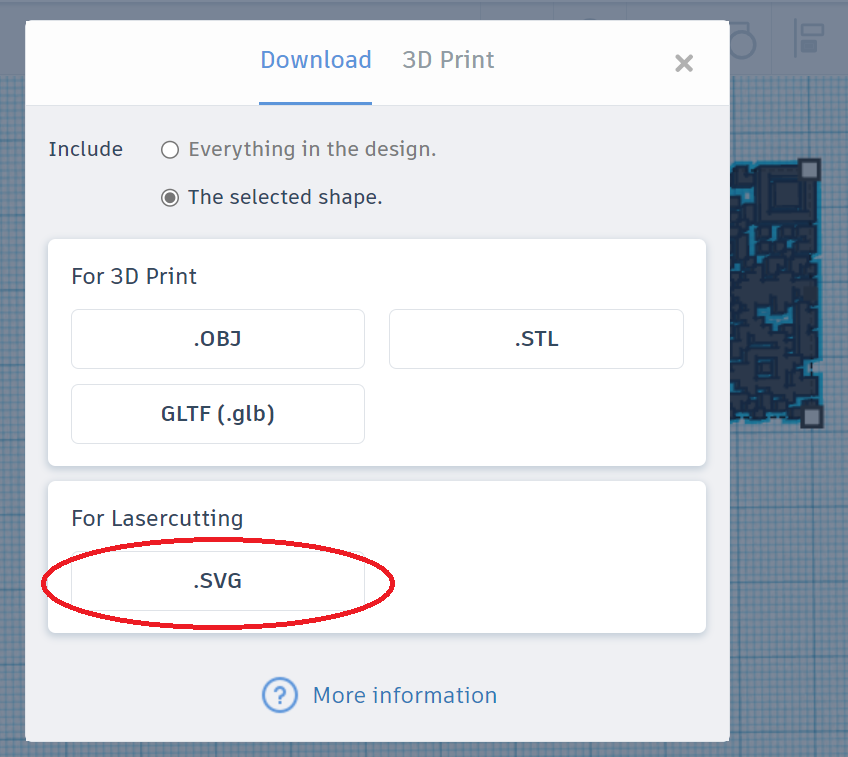
Note – you do NOT have to use this file with only a laser cutter; the saved SVG is also perfect for printing. Also – when Tinkercad exports files, they will be downloaded directly into your default “Downloads” folder, using the name of the “3D Design” which you hopefully changed earlier.
Create a QR code with Zint Barcode Studio
- Download, install and open Zint Barcode Studio.
- From the “Symbology” dropdown list of barcodes, select the “QR Code (ISO 18004) (and HIBC)” entry:

- Next, select the “Data” tab, and copy our specially formatted WiFi text into the “Data to Encode” textbox (i.e. WIFI:S:Central Perk;T:WPA;P:MediumMocha2023!;;):

- Select the “QR Code” tab, and for now, ensure that “Size“, “Error Correction“, and “Mask” are set to “Automatic“. In future, you can use a larger size and a higher error correction to try fancy designs that embed an image or logo into the center of a QR code:

- Next, switch to the “Appearance” tab, where you can choose things like “Border“, “Border Width“, and “Whitespace” between the border and the QR code details:

- Leave “Printing Scale” at the default value – but click on the “Set Printing Scale by X-dimension and resolution” button:

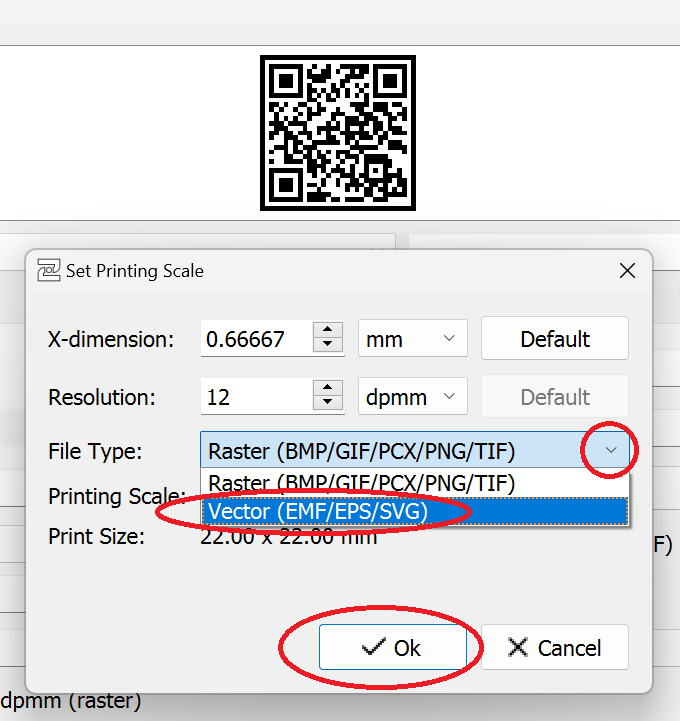
- Select “Vector (EMF/EPS/SVG)” from the list of “File Type” options. Leave all other settings at their default values and select the “Ok” button to continue:
- In the bottom right section of the “Appearance” tab, there is a “Dotty” checkbox – this will change the visual design of the QR code from ‘blocks‘ to ‘rounded dots‘. I have yet to try this on a lasercut sign:

- Once you have the QR code styled how you want, select the “Save As…” button and save your “.SVG” (Note – the button named “SVG” simply copies the generated QR code to your system clipboard – but does not save a file):

- One thing to note – Zint generated QR code SVG files will need a little tweaking later during the ‘lasercut sign design‘ stage – if you do not want that, use Tinkercad to generate your QR code instead.
Test your QR code
Ok… this is very important – regardless of which tool or website you use to create your QR code, you must test it before moving on.
This is critical if you plan to send your design to a sign or poster print shop – or make it yourself.
Testing is simple;
- Print your generated QR code on plain paper – or open it and display it on a screen. Note – if you show it on a screen, you will need a separate mobile device or tablet to test it – it’s impossible to do it on just one.
- Printing should be easy; SVG files will open with your local web browser – if not, try Inkscape – which is free and open-source, and you will likely want it for tweaking SVG files in the future.
- Next, using a mobile phone or tablet – either ‘Forget‘ or ‘Delete‘ your existing WiFi network from your settings – alternatively, enlist the help of someone else who has never been on your network to test.
- Open the system scanner or camera app to test and try scanning the QR code to rejoin your WiFi network. (Instructions for Apple/iOS devices, Instructions for Android devices)
- Your phone or tablet should pop up a screen asking if you want to join your network – so go ahead and join the network!
Design a WiFi QR Code sign for Laser cutting
At last – we get to the part when you will never, ever, ever have to painstakingly guide someone through the soup of letters, numbers and symbols in your network name/password to let them join your WiFi network. Honestly, you could tape the paper you printed earlier – it will get the job done, but perhaps it lacks an element of style or esthetics…
After all that, this will be the easiest part of this entire article.
First – you will probably want to have a few other elements on your sign beside the QR code… Maybe your business name or some other phrase – and perhaps even one (or more) of the “WiFi” logos:
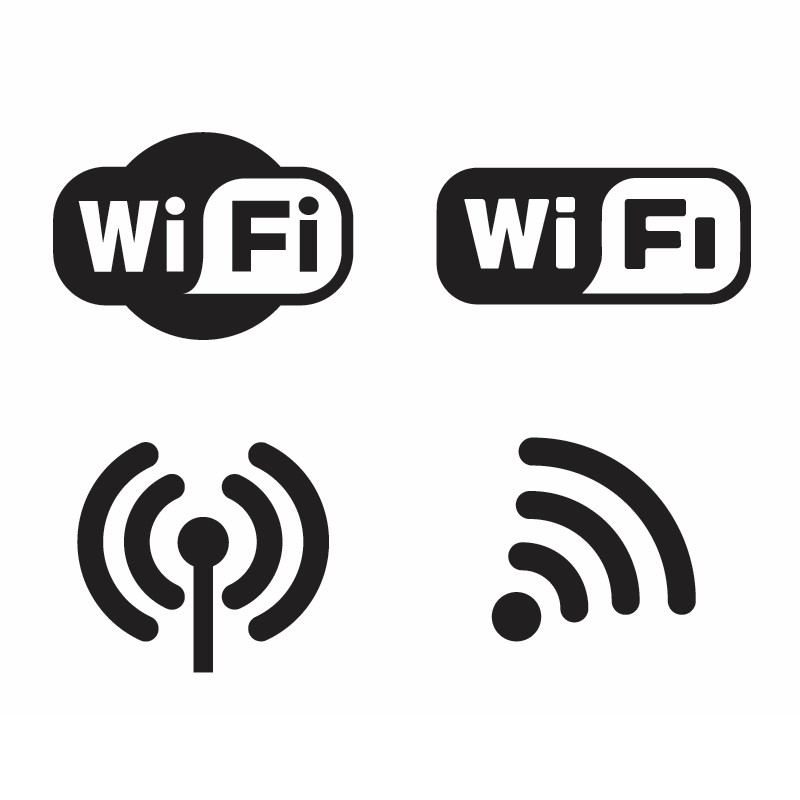
Again – what do we want? Vector images – I found the above on Pinterest. However, as there was no “.SVG” file included, I used Inkscape to convert the included “.AI” file into “.SVG” format – along with some tweaks to make it easier to reuse. You can download the final file directly here.
The following steps will use the “xTool Creative Space (XCS)” software to design, engrave and cut the sign.
(Yes, I know about Lightburn, and yes, it’s excellent – but I have some complications with my ‘enclosure’ that I have to sort out first… like getting a USB cable through a concrete + brick-clad wall that used to be an exterior wall – or buying a small-form-factor PC to leave next to the laser and connect to that remotely over WiFi… I really *wish* Lightburn could use the same USB over WiFi protocols that XCS uses…)
Because I am such a friendly person – I want my sign to literally say: “Welcome” – but I wasn’t happy with any of the fonts available by default.
Did you know that XCS simply reads existing fonts installed in your operating system? This means you can locate free or purchasable fonts, download and install them and use them directly within XCS! For demonstration purposes, I am using a ‘Display font‘ called Wonderblend, by Sabr Creative.
Open XCS to start a new design.
My xTool D1 Pro came with some sample materials; my original plan was to demonstrate with one of the two birch plywood pieces, which measure approximately 148mm wide by 209mm tall. This is useful as XCS will know precisely what Power and Speed settings to use for the cutting portion of this design – make sure you select the suitable material:
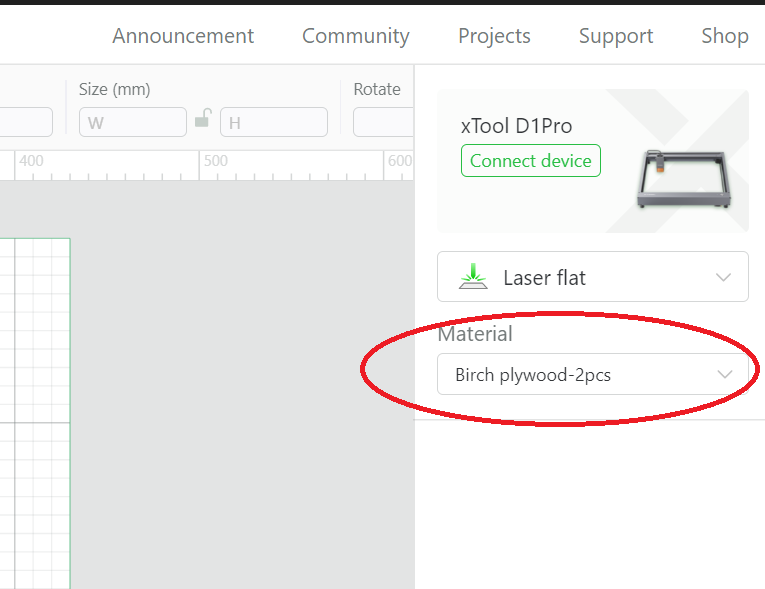
Unfortunately – I *forgot* that I was going to use that wood for this project, made a sign for a friend, and ran out of wood. (I did not want to take screenshots/video footage of their WiFi network details to share with the world…).
So – while the screenshots below are for xTool materials, the final videos are 3mm “Baltic Birch” and the processing settings are as follows:
Engrave:
| Power: | 80 |
| Speed: | 40mm/s |
| Pass: | 1 |
| Lines per cm: | 200 |
Cut:
| Power: | 100 |
| Speed: | 4mm/s |
| Pass: | 4 |
Next – open the shape tool and select the rounded rectangle:
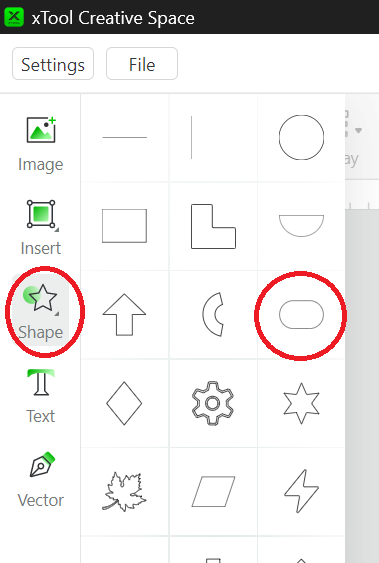
Once your ‘rounded rectangle‘ has been added to XCS, and while it is still selected, change the type of processing from “Score” to “Cut” – and leave the default values alone:
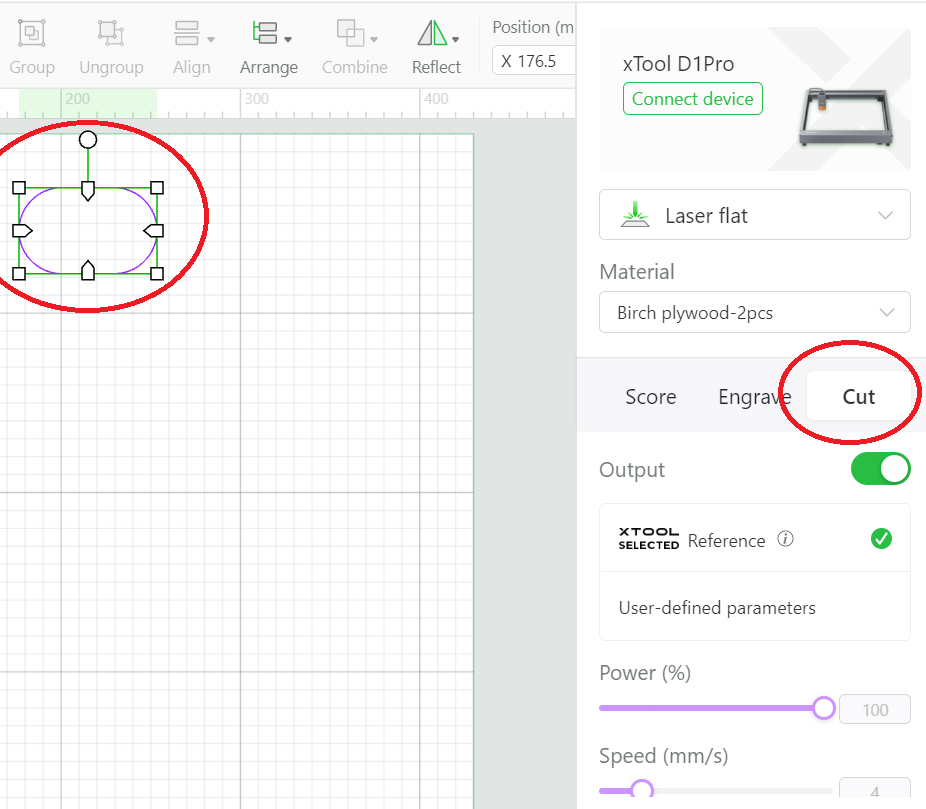
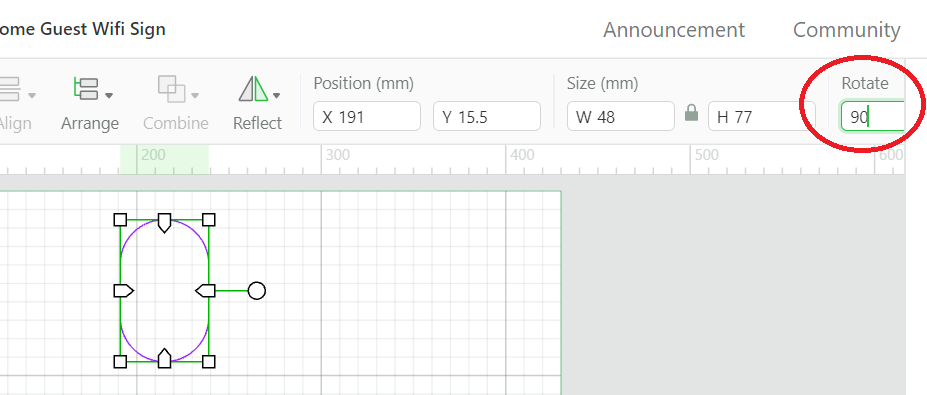
Next, rotate your “rounded rectangle” by 90 degrees:
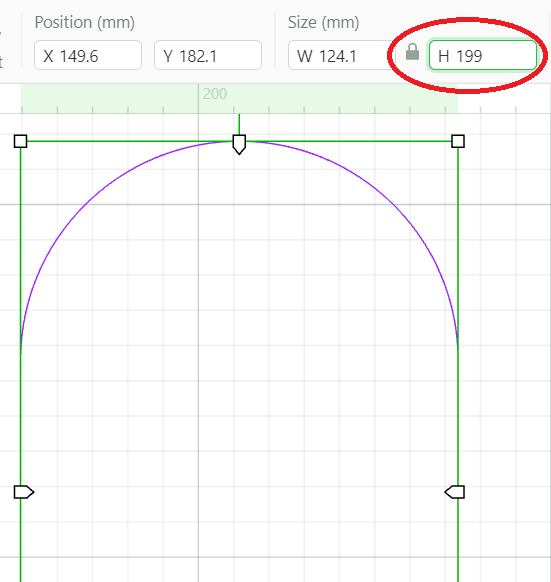
Change the height of the “rounded rectangle” to 199mm, which will make the most efficient use of your wood:
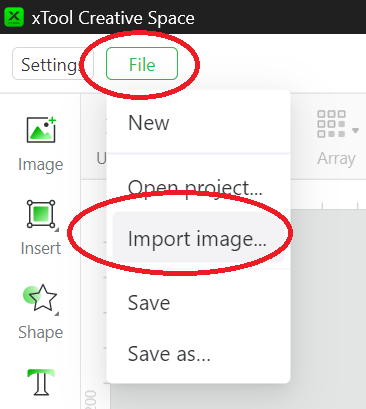
Using the “File” menu, followed by the “Import image…” choice, bring in the “WiFi” image or symbols – I am going to use two:
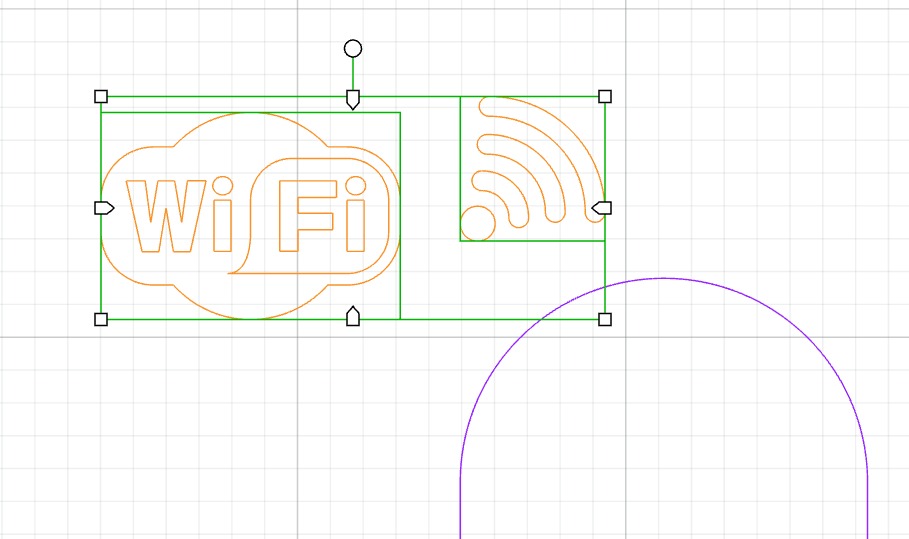
For QR Code signs, I have only tested them as engraved rather than scored – so, with your imported images selected, change the process tab to “Engrave“:

Let’s get the “Welcome” phrase added. First, select the “Text” tool button, then change the text to “Welcome“, choose your preferred “Typeface” (or… Font) and then finally select the “Engrave” tab:

Using the “File” menu, followed by the “Import image…” choice, bring in your QR code SVG file:

If you created your QR code using Tinkercad, no further tinkering is necessary (hahaha – see what I did there? See?)
However, if you used Zint to create your QR code, it adds a few things that need to be fixed before you can safely resize it and set the laser processing choices (i.e. score versus engrave).
When you import the QR code generated from Zint, it will appear as follows:
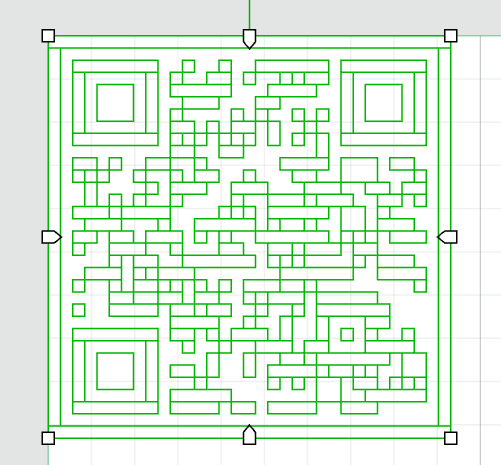
Do NOT try to move or resize it yet – there are some tasks you need to do first.
Left-click your mouse anywhere on the XCS design surface – outside of the imported QR code, to unselect the imported “qr code“:
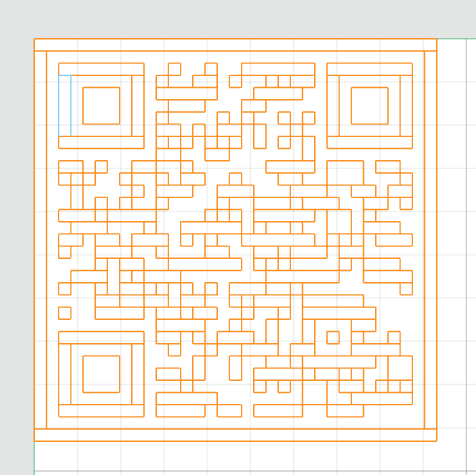
Next – to remove the unnecessary background rectangle that isn’t immediately visible, left-click on any blank space within the imported QR code and press the “Delete” key on your keyboard or right-click and select “Delete“.
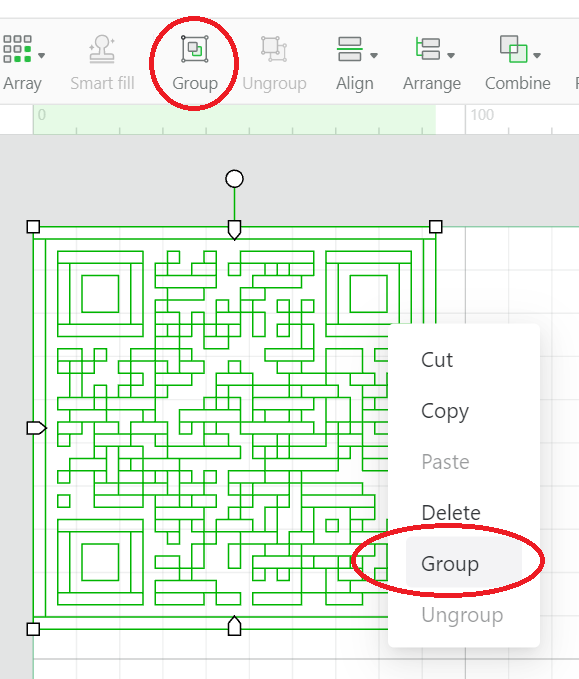
You probably have already noticed that the QR code generated by Zint consists of individual rectangular blocks; you now need to ensure that you are zoomed out far enough to view them all.
Next, select all of the blocks and click the “Group” button on the toolbar, or right-click with your mouse and select “Group” from the pop-up menu:
Those are all the fixups required for your QR code created with Zint; we can catch up with the readers who used Tinkercad instead.
Now that you have an imported QR code image, select and then change the processing type from “Score” to “Engrave“:
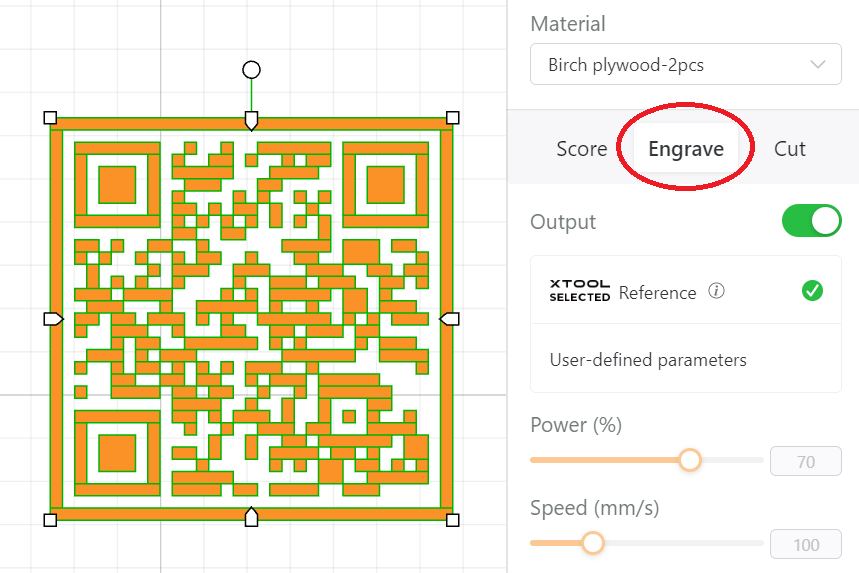
Now that you have all of your graphical elements on your XCS design surface, re-arrange, re-size, align, and finally group them all into a single sign object:
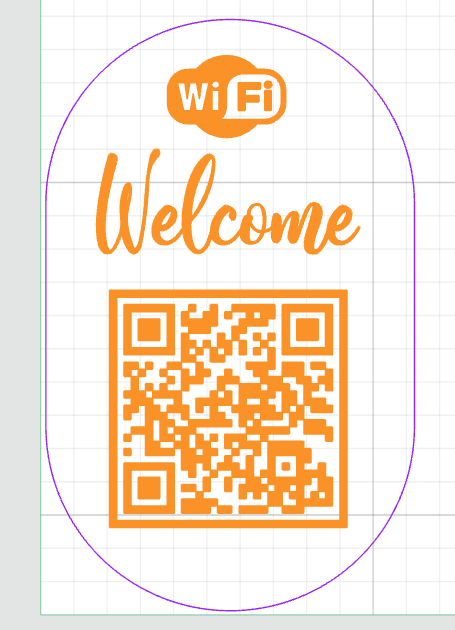
Lasercut your WiFi QR Code Sign!
Because I am using XCS and have previously setup connected my xTool D1 Pro 10w laser previously, and have chosen a material included within the original package, at this point, all I have left to do is;
- Clamp down the material to my honeycomb bed using some clips.
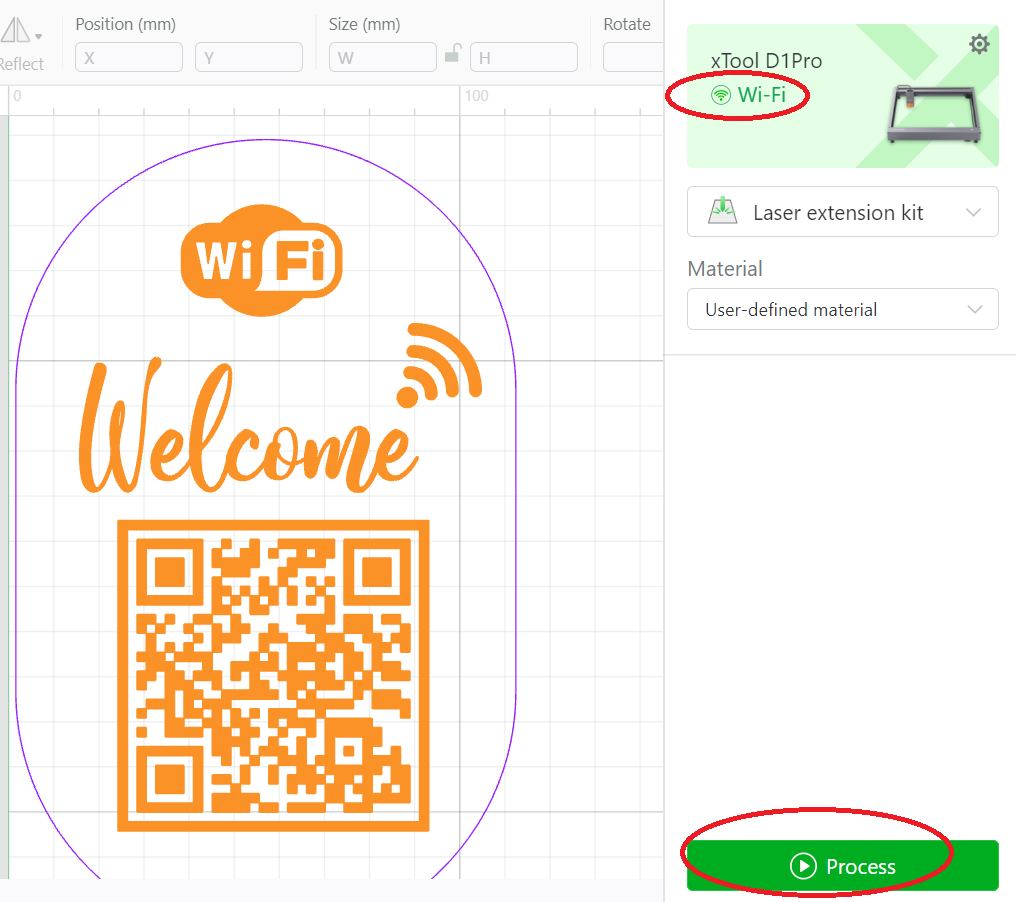
- Turn on the xTool D1 Pro, ensure that XCS is connected and select the “Process” button within XCS:
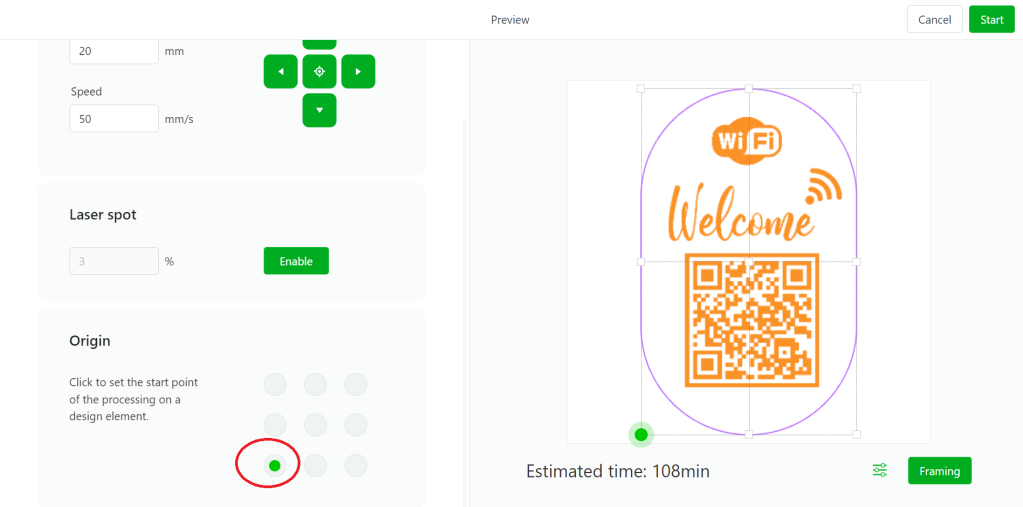
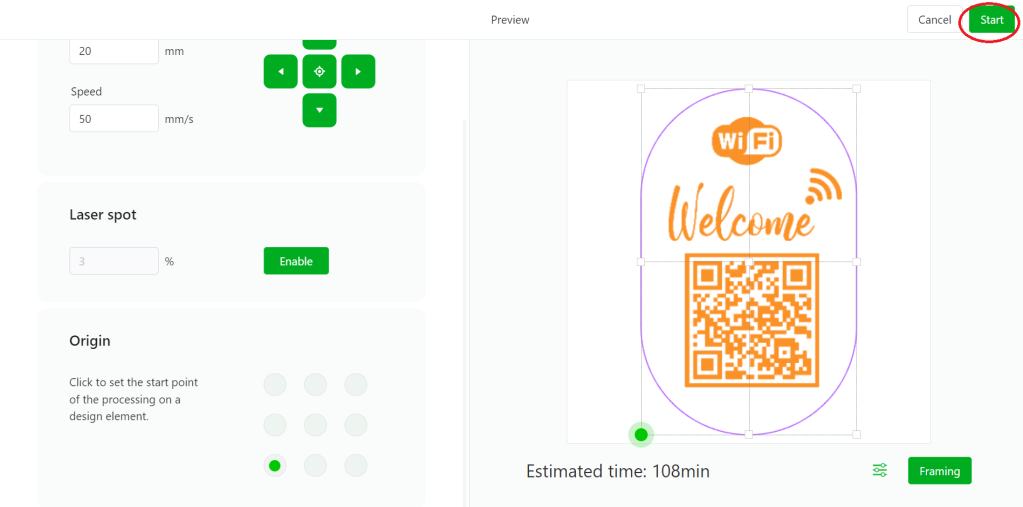
- For my extended-frame configuration, I always ensure that the origin point is set to the lower-left option, it’s just not possible for me to reach the default top-left corner when my laser is in it’s ‘enclosure‘:
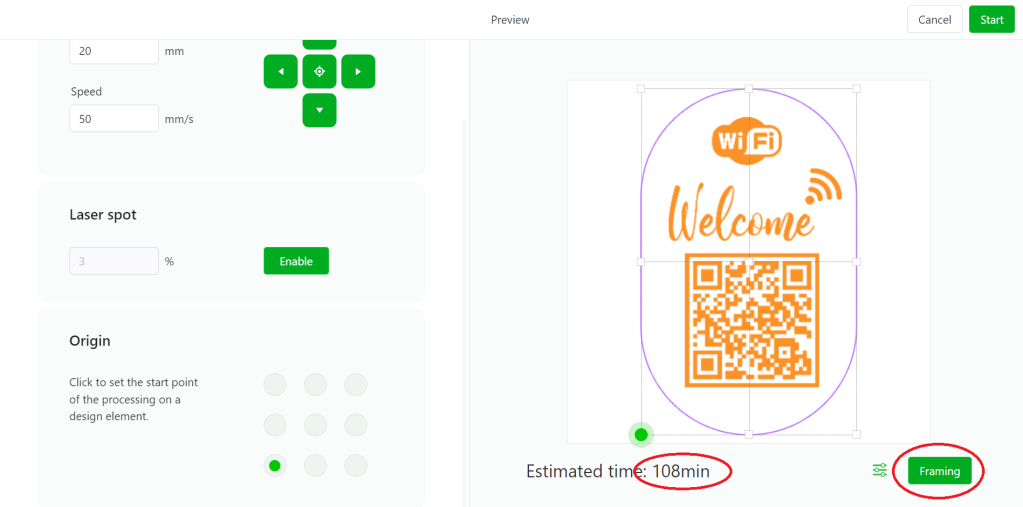
- You might be asking why the “Estimated time” is 108 minutes… This is because, for the ‘engraving‘ settings, I set my “Lines per centimer” value to 200 – which I didn’t need for this demonstration. Oh well, it’s only time…
- Enable the laser spot or cross-hairs and manually move the laser module to the lower-left corner of the material – which, in my configuration, is in the lower-left corner of my laser frame.
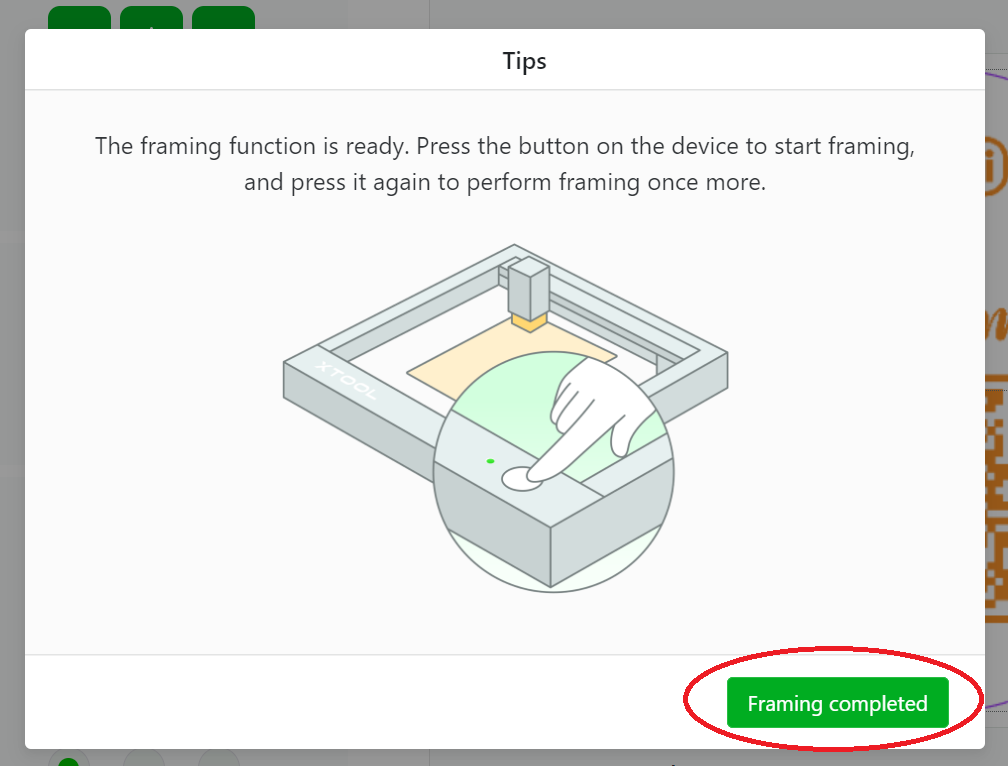
- Click the “Framing” button to test the size and origin location to ensure the path is entirely within the material; if not – move the laser module and frame again. If it is still not within the material size – check your design and re-size accordingly:
- Once the “Tips” window pops up, you are ready to press the physical button on the laser frame to start framing – press the “Framing Completed” button when you are satisfied with the overall position:
- Once framed, click the “Start” button to send the job to the laser:
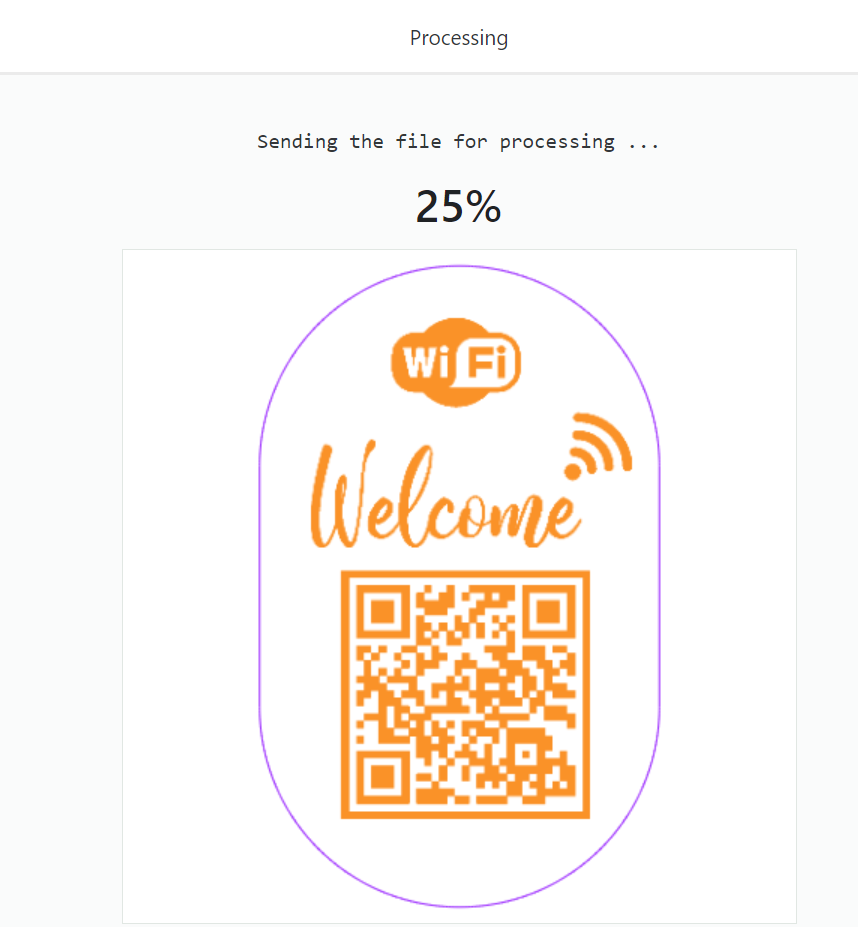
- Wait for the processing to complete:
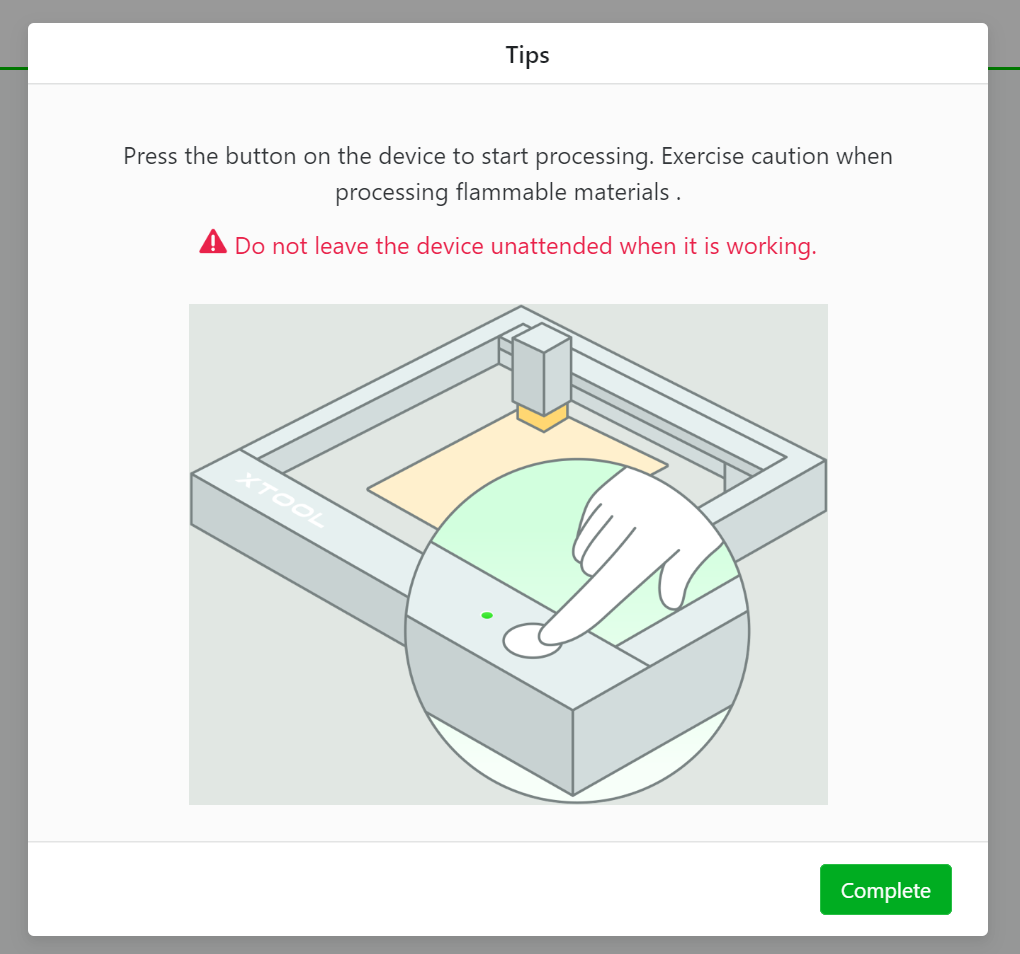
- Wait for the following “Tips” window to appear:
- Turn on the enclosure exhaust fan.
- Turn on the air assist.
- Press the physical button to ‘FIRE THE LASER!‘…
- Run away, and close your enclosure…
- You are wearing your safety goggles, right? …
- Sigh … I wish mine would fit over my glasses, but… sadly, neither the included pair nor the aftermarket ‘FreeMascot’ work for me…
Depending on your laser and material choices, your process may be vastly different – however, if you use another xTool laser module (5w, 20w, Infrared, 40W, and xTool provided material – XCS will adjust the power/speed settings from the library of materials automatically.